Blooming apple tree made of beads. Master Class
How beautifully the trees bloom in spring: apple trees, cherries and apricots. They, as if dressed in a bride's outfit, attract attention and evoke joy in the soul of every person.
The only pity is that their flowering lasts very little. After a while, the flowers fall off and a delicious fruit forms in their place. And that's great! But you won’t see such beauty anywhere before a year. And I really want to admire this natural splendor more than once throughout the year.
Of course, we are not magicians and will not be able to influence nature. But we are quite capable of making a small tree from beads with our own hands.
To make an apple tree in blossom from beads we will need:
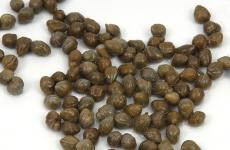
Beads in two shades of green, as well as pink and white.
- wire for beads
-brown floral ribbon
-gypsum or putty mixture
-flower pot
-Styrofoam.
We will use the weaving technique that I often use when making beaded trees. Namely looped. It looks beautiful in the finished result, is easy to perform, so even a novice craftswoman can master it.
We will weave an apple tree in spring bloom.
To make it, I took 4 types of beads.

Cut a piece of wire about 50 cm long and string 7 beads onto it.

Place them in the middle of the wire and twist the first loop.

Place 7 beads on both ends of the wire and twist the loops about three turns.

There should be 9 loops on one branch.

The twig is ready. In total we make 9 branches of 9 loops for the top, 1 branch of white beads, 4 branches of green beads and 4 of white and pink.
To make a twig from white and pink beads, you need to put 1 pink bead, 5 white beads and again 1 pink bead on a wire and twist a loop. We form loops for the entire branch in the same way.
You can make as many branches as you like. The more branches, the more magnificent the tree will be. If you plan to make it large, then leave the wire longer at the ends of the branches, as it will serve as the trunk of the tree.
I made 10 green branches of 11 loops each, 4 of 9 loops each, 10 branches of 11 white loops each, 20 branches of 11 loops of white and pink beads, 6 branches of 13 loops of white and pink beads for the lowest tier of the apple tree.

When all the branches are ready, you can start assembling them.
First we take the branches that we made for the top of the tree and twist them together in three pieces.

We do the same with the remaining branches.

Now each resulting branch needs to be wrapped with brown floral tape.

You can assemble it into one whole tree with one trunk or make a branch in the form of two connected ones.

We collect the branches so that those with fewer loops are at the top and those with more are at the bottom of the tree. If the branches turn out to be heavy and the trunk is thin, then you need to wrap the branches on a thick wire that will hold the entire tree.


Then we dilute the gypsum mixture separately and pour it into the pot.
Separately, you can make flower bushes and “plant” them near the apple tree. You can decorate the plaster by painting it with black acrylic paint or filling it with beads of the same colors as the tree.
If you don’t like that the trunk is too thin, then mix diluted gypsum and PVA glue 1:1 separately in a container, and, wrapping the branches with foil, cover the entire trunk with this mixture, thickening it and giving it the desired shape. Then give it a realistic look with paint and varnish.


Our beaded apple tree is ready and will remind you of spring throughout the year, delighting and giving memories of beautiful warm spring days.
Lori Sequin weaving. Tree of Happiness “Blossoming Magnolia” – review

The blooming magnolia is wonderfully good, but the manufacturer made a mistake ((I’ll tell you how to fix the mistakes and get a great result. TREE OF HAPPINESS with your own hands.
Spring is coming and I have some handmade inspiration; I want to create something beautiful and cozy with my own hands after a long break. After the crystal swan, I came across a box for handmade creativity in the Magnit hypermarket as an order. It didn’t bother me that it was more for children; I was interested in the result, namely, a tree of happiness made from sequins. I love making trees, I have 3 of them. I used to think about making topiary from beads, but this is not one week of work (or even months), I can’t stand so much, but I want beauty faster. That's why I immediately bought a set from Lori.
Where can I buy : Magnit hypermarket, children's stores.
How long does it take: It took me, an adult, two days (not full).
Here is a small box with a pretty blooming magnolia:

The factory offers more models from the series: orange tree, yin-yang, apple tree. There was only magnolia in Magnit, it’s a pity there was no choice, but I don’t regret it, the result is pleasing.

So, let's open the box. Here's what's inside:

Everything indicated on the box in a complete set. There’s just one thing Lori’s company didn’t think through, more on that below.
At first I was afraid to pick it up, the last time I held beads was in college, I didn’t really like stringing this little thing, you’d get all worn out. Here it goes only in the hearts of magnolias, which is good: there will be little torment.
SO: HOW to make a tree of happiness.
She inhaled and began to weave leaves. The first branch took a long time to prepare, the leaves were easy to make, but I couldn’t figure out how to make the flowers: there wasn’t a word about it in the instructions, I struggled for an hour, then I adapted my method, or maybe it’s their unexplained method: the petals contain 2 holes: first thread them through the one closer to the middle, then to the one on the edge. As said, I wove 9 branches with a flower and 3 with leaves:

I combined them into three large branches:

And that’s all: it is proposed to make a tree from these three large branches. So few?? It’s good that I read a girl’s review of a similar tree (orange), and she notes that three branches will not make a beautiful, lush product.
The wire ran out, but there were still sequins and petals left, so I found my own similar wire and added another large bunch. So I got 4 branches, which I connected into one trunk.
Next, having finished preparing the wood, it is proposed to take a plastic mold and fill it with plaster. I didn’t like this option, I know that the base can be made more beautiful. Therefore, I decided to find a suitable pot and plant a magnolia there.
Happiness landed in Fix Price, there I found and ceramic pot the right size and the weed that came with it. I plucked the grass, spread the plaster, planted a tree and filled it with the mixture, and while it was hardening, I stuck the grass into the plaster: it turned out great.
The tree of happiness with my own hands turned out like this: my gift to myself. There are 4 branches, with 5-6 it will be even more magnificent and beautiful.

The final touch was decorating the pot with a rope and a pendant. You can come up with anything here.
In my opinion, it is very beautiful, spring-like, such a tree will be a pleasant gift for the soul to your mother, friend or any lady you want to please.
Personally, I would be happy to receive such a tree, and a gift made by hand always has a special value. It’s not for nothing that it’s called the “tree of happiness.”
And now I’m laying out in detail point by point how not to be disappointed in the resulting magnolia, because if you do it according to the scheme, there is a chance of getting a scanty and gnarled tree.
1. The wire in the set is enough for exactly 3 branches. I noted that three is not enough, the tree will be sparse, you need to make at least one more branch for a lush crown, which means buy or find the same wire. I took it out of an old battery. In addition, the manufacturer advises cutting 40 cm for each branch, I would recommend 50 cm, this way they turn out more solid, longer for the trunk and do not bend. There won't be enough wire anyway. (+percentage for defects).
2. We also regretted the yarn, I bought a skein of the same brown, it costs 30 rubles, I advise, if you don’t have the same color, buy a similar one and use it first. And type-setting wrap the already finished tree.
3. When making leaves, twist the leaf around the wire, and not vice versa, it will turn out more evenly. Keep the wire slightly taut between two fingers.
4. I still have a couple of petals left and a bunch of red “core” sequins. I don’t understand why they packed so many of them. But you can make flowers out of them to decorate a pot or weave new magnolias, although you will also have to buy more petals and leaves, they run out faster.
5. The plaster is enough for the typesetting mold and my stand, so take a little water, less than half a glass.
6. Well, if you want a beautiful pot stand, look at Fix Price, they have a lot of heart-shaped molds, etc., as well as pebbles, grass, and crafts for decorating the finished product.
Tips for visual configuration:

Here are my tips and comments. By the way, this applies to all sets of “Trees of Happiness” from this company, judging not only by my review.

Warm spring and more creative inspiration!
MORE crafts from kits:
Beaded tree “Apple tree in bloom”
Weaving kits will be of interest to girls over 7 years old. They can with your own hands make a beautiful original souvenir from beads "Tree of Happiness", which symbolizes love, beauty, luck and harmony.
Bead weaving very interesting handicraft DIY wood making- this is truly creative work.
Before work, you must read the instructions. The base-stand is made of gypsum, which is mixed in a special container and poured into a mold to harden. The trunk and branches are twisted from wire. Flowers and leaves are created from blanks and decorated with beads and sequins. All components for completing an exciting task are included in the kit and are safe and environmentally friendly.
The set contains: beads, acrylic beads, sequins, brown yarn, wire, plaster, polystyrene mold for pouring plaster, detailed instructions.
For children from 7 years.
There are no reviews yet.
Only registered customers who have purchased this product can post reviews.
podarki-v-almaty.kz
Tree of happiness apple tree in bloom made of beads
Delivery of the order is carried out within 2-3 days from the date of registration. You can discuss your delivery wishes with the manager during the ordering process.
Delivery cost in Moscow (within the Moscow Ring Road)
A fun set for children's creativity LORI “Tree of Happiness. Apple tree in bloom" will allow the young creator to create an unusual souvenir - a tree of happiness, a symbol of love, beauty, good luck, harmony. Such a tree can become an interior decoration or a wonderful gift made with your own hands.
Working with the kit will be very exciting for the child and will contribute to the development of fine motor skills, creativity, accuracy, attentiveness and perseverance.
The set includes: beads, acrylic beads, sequins, brown yarn, wire, plaster, polystyrene mold for pouring plaster, detailed illustrated instructions.
Package size: 21 x 13.5 x 4 cm.
Packing: cardboard box.
Weight: 350 g.
Tree of happiness made of beads: master class with step-by-step photos.
Nowadays, you rarely find a house in which the tree of happiness does not “grow”. This talisman has firmly won the hearts of millions of people. Even if you don’t believe in its magical properties, the tree of happiness is a good interior decoration. You can use this craft as a gift for family and friends. We offer you a master class on creating this magical tree of happiness from beads.
To create this craft we will prepare:
- Beads of the color you choose (for example, lilac) and always green;
- Thin wire, preferably copper;
- A small piece of thick, stiffer wire;
- Brown twine;
- Gypsum;
- A small piece of foam;
- Construction tape;
- Acrylic paints.
If everything is ready, let's start creating crafts and prepare lilac beads.
String a lot of beads on the wire in random order.
We take 10-11 pieces of beads aside.
Bend it into a ring and twist the ends of the wire 2-3 times.
We repeat the procedure. There should be a gap of 1-1.5 centimeters between the turns.
We twist 13 such rings on a wire.
We bend the part in the middle and connect the ends of the wire.
Twist both ends together.
We bend everything towards the center. You can do this by pulling a twig through your fist. The result is one branch for the tree of happiness.
We prepare at least 30 such branches.
Using the same principle, we make 10 emerald-colored branches. The difference is the size of each ring - 5 pieces of beads.
We twist three pink branches together so that 1-2 centimeters remain untwisted before the beginning of the rings.
Add to them three more pink branches and two green ones. Twist the ends of the wires tightly.
We wrap twine or tape around the free end of the wire. Let's secure it. The result was a blank barrel. We make four more such elements.
We connect all five blanks by twisting. We strengthen it by wrapping the trunk with thick wire. The top layer is twine.
We make a slide out of foam plastic using construction tape.
We install the craft on the resulting slide. We straighten the ends of the wire to the sides, as if clasping a hill.
We dilute the plaster according to the instructions. We lay our foam slide with gypsum mixture, while grasping the tree trunk. We are waiting for the plaster to dry.
We paint the branches of the craft brown.
At the foot of the tree we draw a clearing. We paint the foam around it like rocky soil. To create a realistic effect, use different colors of paint.
We “plant” beaded flowers in the clearing.
Preparation of flowers is prepared according to the same principle. We combine multi-colored beads. Here is the connection of two parts.
We insert them into the foam in place of our clearing.
A wonderful and original gift – the “Tree of Happiness” is ready to delight its owner.
moy-karapuzik.ru
How to weave a tree from beads? Step-by-step instructions with photos!

Products made from beads have always fascinated with their beauty and unusual execution. Various bracelets and baubles made of glass balls and tubes gave the girl individuality and emphasized her unique style. It is noteworthy that such decorations originate from ancient times. At that time, products made using glass beads and threads had the function of protecting against the evil eye and damage, and served as a talisman against evil spirits. In the 60s of the 20th century, a real hairdressing boom began thanks to the emerging hippie movement. Almost entirely the clothes of the “children of the sun” were hung with various beaded ornaments. Even on the wedding day, young people exchanged not rings, but miniature baubles.

Beading is still relevant today. And for beginners in this business, it is considered interesting how to weave a tree from beads. Before you start practicing beadwork, you need to stock up on all the necessary items - fishing line, needle, hooks, knitting needles and, of course, the beads themselves. It is worth noting that different jewelry requires different beads. Weaving is recommended to be done on a non-slip surface. To do this, you can lay a tablecloth or a linen napkin on the table.

All beadwork is reproduced in accordance with special patterns. To begin with, it is recommended to choose a lighter one. You should also make sure that there will be enough material to complete the entire product. After this, you need to familiarize yourself with the weaving method, for example, see how to weave a tree from beads. It is possible to make any ornament from beads, but for beginners it is preferable to stick to a simpler one and try to weave a flower. To do this, you will need to have wire, scissors, and beads.
You should start working by threading beads through the wire and securing them. Next, you need to weave the subsequent rows in a similar way, constantly adding one more bead. As you weave, the number of beads will need to be increased - from 2 pink to 5 red, and then, on the contrary, reduced. This is necessary to give the flower symmetry. The flower will also need a middle, which can be completed using a large bead. The last step will be to connect the middle bead and the petals of the flower by threading the wire.
To weave wood beads you will need all the same items and green and pink beads. You need to make a loop on the wire, first stepping back 15 cm from the end, and string the beads themselves onto it. With a gap of half a centimeter, you should weave tree leaves from 4 beads. The leaves will need to be straightened, and then twisted into 5 more similar wires. Following this, 3 wires are twisted into one. The resulting branches, 3 in number, must also be twisted into one. The final step will be to paint the tree trunk with brown paint. The branches should be straightened.
Greetings to all readers of Alena Kravchenko’s blog. My name is Olga Andreeva. Tell us about yourself. I live in Transnistria, in the city of Tiraspol. Our region is wonderful, beautiful, sunny. The city is located on the banks of the Dniester River, surrounded by greenery.
I love my city very much, I was born here, raised two daughters, and now I’m helping raise my granddaughter. Although I am no longer young, I feel young at heart, especially next to my granddaughter. We create with her, fantasize, read fairy tales, play and walk. Grandma has no time to be bored right next to a perky and mischievous girl who makes us very happy.
I don't have much time because I'm working. But I really love doing handicrafts and creativity. It helps me relax, calm down, and take my mind off my problems. For me, creating something with my own hands is a kind of therapy. I love to knit, mostly with knitting needles, but I’m also gradually learning to crochet. We make different crafts for the home with the children. For the third year now I have been running my blog “Children and Grandchildren”, where I talk about our hobbies with children. We try a little of everything that interests us. There are so many exciting things, I want to learn a lot.
I thought for a long time whether to take part in this competition. Such serious and beautiful works have already been sent. But I decided to finish what I started and send my modest work to your judgment.
I will show you and tell you how I made the “Apple Tree” tree from beads. There are a lot of apple trees in our region. In spring, these trees bloom very beautifully, and in autumn they delight with their tasty and healthy fruits. I really love these trees. So I wanted to make an apple tree from beads.
Handicrafts use beads to make such beautiful jewelry and embroider pictures. This is an ancient craft. But even now it is very popular. The process is creative, it requires perseverance, patience, and the ability to concentrate on a small, painstaking task. But the result pleases everyone. Crafts made from beads can be given as gifts. A great handmade gift. You can decorate your home.
Beaded tree "Apple tree". Master Class
Necessary materials:

- green beads of different shades
- red beads 40-45 pieces
- copper wire
- steel wire
- brown floral ribbon
- acrylic paint brown
- PVA glue
- tassel
- gypsum powder
- scissors
Let's start making wood.
1. To make the tree leaves look more natural, mix beads of different shades together.

We weave twigs
2. We will need 39 branches. Cut 70 cm of copper wire for one branch.

3. We string 11 beads onto the wire and twist them into a loop, leaving 10 cm at the end. We step back 8 mm from the loop and make another loop by stringing beads. Having made 3-4 loops, string a red bead onto the wire, then 3 green beads and return the wire back to the bead. This will give us an apple on a branch.
And to the end of the wire we make more loops of 11 beads each. We also leave 10 cm at the other end. The branch is ready. We place one apple on one branch, on some you can make two.

4. Twist the branch in the shape of the letter Y. You should get 39 such branches.
Forming the tree crown
1. Let's start making branches. To do this, we connect our branches together, 2, 3, 4 pieces each. You get different branches. You should get three quadruple branches, seven triple branches and three double branches.
There are 13 branches in total.
2. We make even larger branches, connecting them two at a time. It turns out 5 branches and three pieces remain single. There are 8 large branches in total.
3. Cut 15 cm from the floral tape and wrap the apple tree branches with tape.

Apple tree trunk and branches
1. Making a trunk for an apple tree. We cut 45 cm from the steel wire (to cut it, we borrow a hacksaw from my husband), bend it in half, twist it, and we get a tree trunk.
2. Form the trunk. We took a double branch, cut off 15 cm of tape and tied it to the top of the tree. Next, we attach 2 more branches to the main trunk, one higher, the other lower (single and double). For each branch there is 15 cm of ribbon, for a total of 3 branches there is 45 cm of floral tape. The main trunk is ready.

3. We make two more side branches in the same way. For the first, we cut off 15 cm of thick steel wire and 15 cm tape, wind two branches in turn, one double, the other single. This branch requires 30 cm of tape (2 x 15 cm).
4. We make the second branch in the same way, but we already use two thick wires of 15 cm each and three branches, a 45 cm ribbon for them. We wind the top to one wire, and just below another single wire. To the other - one double. We twist the branches together.
5. We tie one branch to the trunk with a 20 cm tape, and then another. The tree is ready. We straighten the wire at the bottom to make the tree more stable.
6. Now our tree needs to be planted in plaster. For 1 glass of water you need 1.5 glasses of gypsum. Pour the powder into water and stir until the solution resembles thick sour cream. They took a mold, placed the tree and filled it with plaster. The tree should stand straight, adjust if necessary.
7. Make the trunk thicker at the base by coating it with a plaster solution using a brush.
8. When the plaster dries, remove the mold and begin painting the tree trunk with brown acrylic paint. My granddaughter helped me do this; she loves to paint and draw.

Weaving trees from beads is gaining more and more popularity. There are many diagrams and descriptions appearing on the Internet on how to create such beauty. We will also try to tell you how to make a beautiful apple tree from beads with your own hands using a step-by-step master class with a diagram and photo.
Tools and materials Time: 12 hours Difficulty: 8/10
- beads No. 8 mother-of-pearl green;
- beads with a diameter of 8 mm, peach color;
- thin copper wire;
- metal rod;
- floral tape;
- decorative stones;
- flower pot;
- gypsum;
- pliers and wire cutters.
Step-by-step weaving instructions

To make the apple tree look as much like a real tree as possible, it is very important to choose the right color scheme of beads.
Step 1: cut the wire
First you need to cut a lot of pieces of wire. The length of each piece is about 25 cm.
Step 2: making leaves
Now we string 5 beads onto the wire and twist them into a loop at a distance of about 5-7 cm from the end of the wire (Fig. 1). Having retreated 0.8-1 cm, we make another similar loop. Having made 3-4 loops, replace them with a loop with one bead. In this way we make several loops (necessarily an odd number), leaving a free end of the wire 5-7 cm long.
Step 3: collecting branches
Next, bend the wire on the central loop and twist its ends together. One branch of the future apple tree is ready. Now we need to make about 100 of these branches - it is with this quantity that the beaded tree will look quite magnificent.

Step 4: Twist the branches into bundles
When the branches are ready, we begin assembly. By twisting the branches together, it is necessary to form bundles of 10-12 branches.
Step 5: Making the Base
Next, we collect the resulting bundles near the solid base. The solid base is ideally a rigid rod - a special metal stick for producing stems in beadwork or used for making artificial flowers. In the absence of such a stick, we advise you to use improvised means - you can take a wooden kebab skewer, you can use a pencil, in general, anything that comes to hand. By securing the resulting bundles of branches by winding, we form the very shape of the tree.
To make the tree trunk look natural, we wrap it with floral tape (adhesive, slightly corrugated paper in the form of a tape).
Step 6: fill with plaster
After this, it comes to planting the bead tree. Using plaster, secure the tree in a mold or flower pot, and then decorate it with any decorative stones.
We hope our master class and weaving pattern helped you and you got your own unique beaded apple tree, made by yourself, which now decorates your cozy home.
Beaded apple tree: weaving a tree with juicy fruits (video)Beaded apple tree: weaving a tree with juicy fruits (video)
Trees created using beadwork delight the eye and decorate any interior. Compositions created with your own hands are especially delightful. You can make quite interesting trees that will be a wonderful decoration for any interior. A representative of such handmade work will be a delicate blooming apple tree made of beads. A simple master class will allow even beginners to create unique decorative elements. 


Master class on apple tree beading
A beautiful tree with a lush crown, ripe apples or blooming flowers looks simply amazing. Making such a tree is quite easy using simple video lessons or the step-by-step work described below. For beginners, the proposed beadwork will not be difficult. The main thing is to follow the step-by-step instructions.
The main stage of weaving

We put five beads on one selected segment. We twist the beads into a loop measuring five to seven centimeters from the end of the wire, Figure 1;
In this method of beading trees, you need to use a stiffer small rod, which will become the basis for all the twisted branches. If there is no such ready-made metal rod, then you can make it from a simple pencil or any wooden stick.
Bunches of twigs are wound around a base or rod. To make the trunk look neater, it is wrapped with special corrugated paper or tape for floristry. 
Weaving according to this pattern will allow you to create a blooming apple tree, if you use, in addition to green beads, various pink shades and inclusions of white beads to create an apple tree color.
To create a tree with fruits, the following weaving pattern is suitable:
- two or three beads are placed on the wire and the apple bead, retreating from the edge by five to six centimeters. The remaining long tail returns back through the bead;
- the wire is tightened, and continuing to form coils around the axis, we get the first inflorescence with an apple;
- ten to eleven more beads are added to the long end. They are fastened into a loop closer to the bead - an apple;
- All the time, beading occurs on a long part of the wire. This process of creating an inflorescence with an apple is repeated. Weaving alternates with leaves;
- Make branches with leaves separately, separately with apples. Then everything is twisted into small bundles, and then placed on the main rod.


This weaving scheme provides that at the end of the whole work the tree will be “planted” in a special pot. This could be a specially created pot with decorative stones, or a tree core will be poured into plaster, another decorative material for various crafts. 

An apple tree made of beads will look great in any decorative pot, as in the photo, which is easy to create using your imagination and a simple master class. For beginners, mastering this beading technique will not be difficult. The main thing is to show desire and a little creative thinking.
Video: Learning to weave an apple tree from beads
Comments
Related posts:
 Birch beads step by step weaving for beginners (video)
 Beaded belt: weaving an original accessory (video)